
#
Quick Start
#
1. Sign in
Open Data Pools and click Sign in with PHOENIQS SSO. Use your PHOENIQS account, the same one you use for PHOENIQS Chat and the Phoeniqs Console.
You land on Data Pools, the list of the pools you can use. Every user already has one, AI Chat, which holds the files you added to chats for file search. See Chat and agents.
#
2. Create a pool
- Click Create data pool.
- Leave the Pool type on Knowledge (RAG).
- Enter a Name, such as
Contracts 2026. - Choose the Access: Private, for you and the members you add, or Organisation, for everyone in your organisation. You can change it later. See Access.
- Add a Description of what the pool holds. Agents read it to decide whether the pool is relevant, so a sentence or two is worth it.
- Keep the suggested Embedding model.
- Click Create.
The name, description and embedding model are set once, when the pool is created.
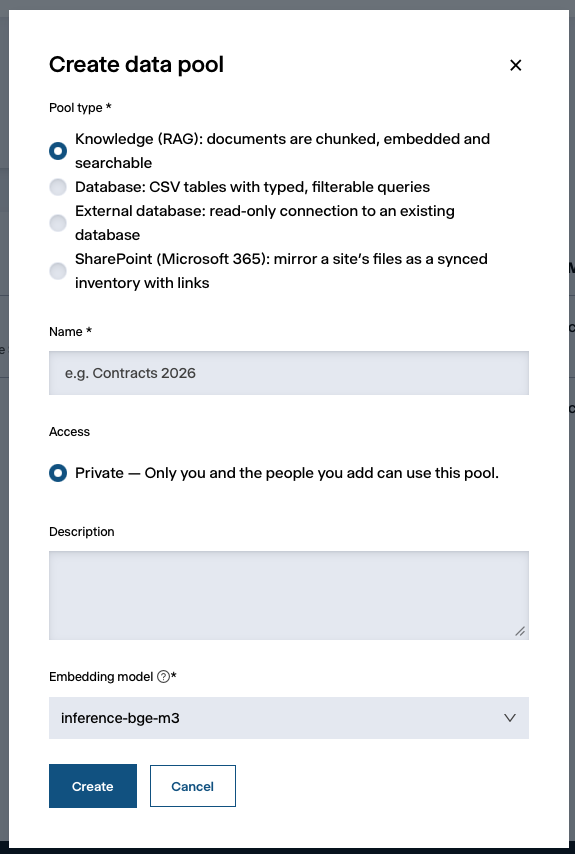
For tables, a database or a SharePoint site, choose another pool type. See Pool types.
#
3. Upload documents
Drag files onto the upload area of the new pool, or click it to choose them. PDFs, Office documents, text and HTML work, and so do scans and images, which are read by OCR.
Each file shows Queued, then Processing, then Ready, and the list updates by itself. Large or scanned documents take longer. See Documents.
Administrators also see Test retrieval, where they can try a question and see the passages an agent would receive.
#
4. Use it with an agent
Agents reach your pools through the Data Pools MCP server. In a PHOENIQS Chat connected to your Data Pool, an agent can list, search and query every pool you can read. See Chat and agents.
#
What's next