
#
Agents
Agents are the core building blocks of the AI Concierge. Each agent is a customized AI entity designed to interact with users based on specific goals, behaviors, and personas you define. This section outlines how to create, edit, duplicate, and delete agents in the Phoeniqs portal.
#
Features
Create New Agents Build fully customizable AI agents tailored to your business needs.
Edit Agents Modify agent details, instructions, behavior, or goals at any time.
Duplicate Agents Quickly clone an existing agent as a base for a new one.
Delete Agents Permanently remove agents that are no longer needed.
#
Create New Agents
To create a new agent, follow these steps:
- Log in to Phoeniqs portal and access your subscription.
- Click on "Create new agent" in the sidebar.
- The Agent Builder modal will appear. Follow the guided steps to configure your agent.
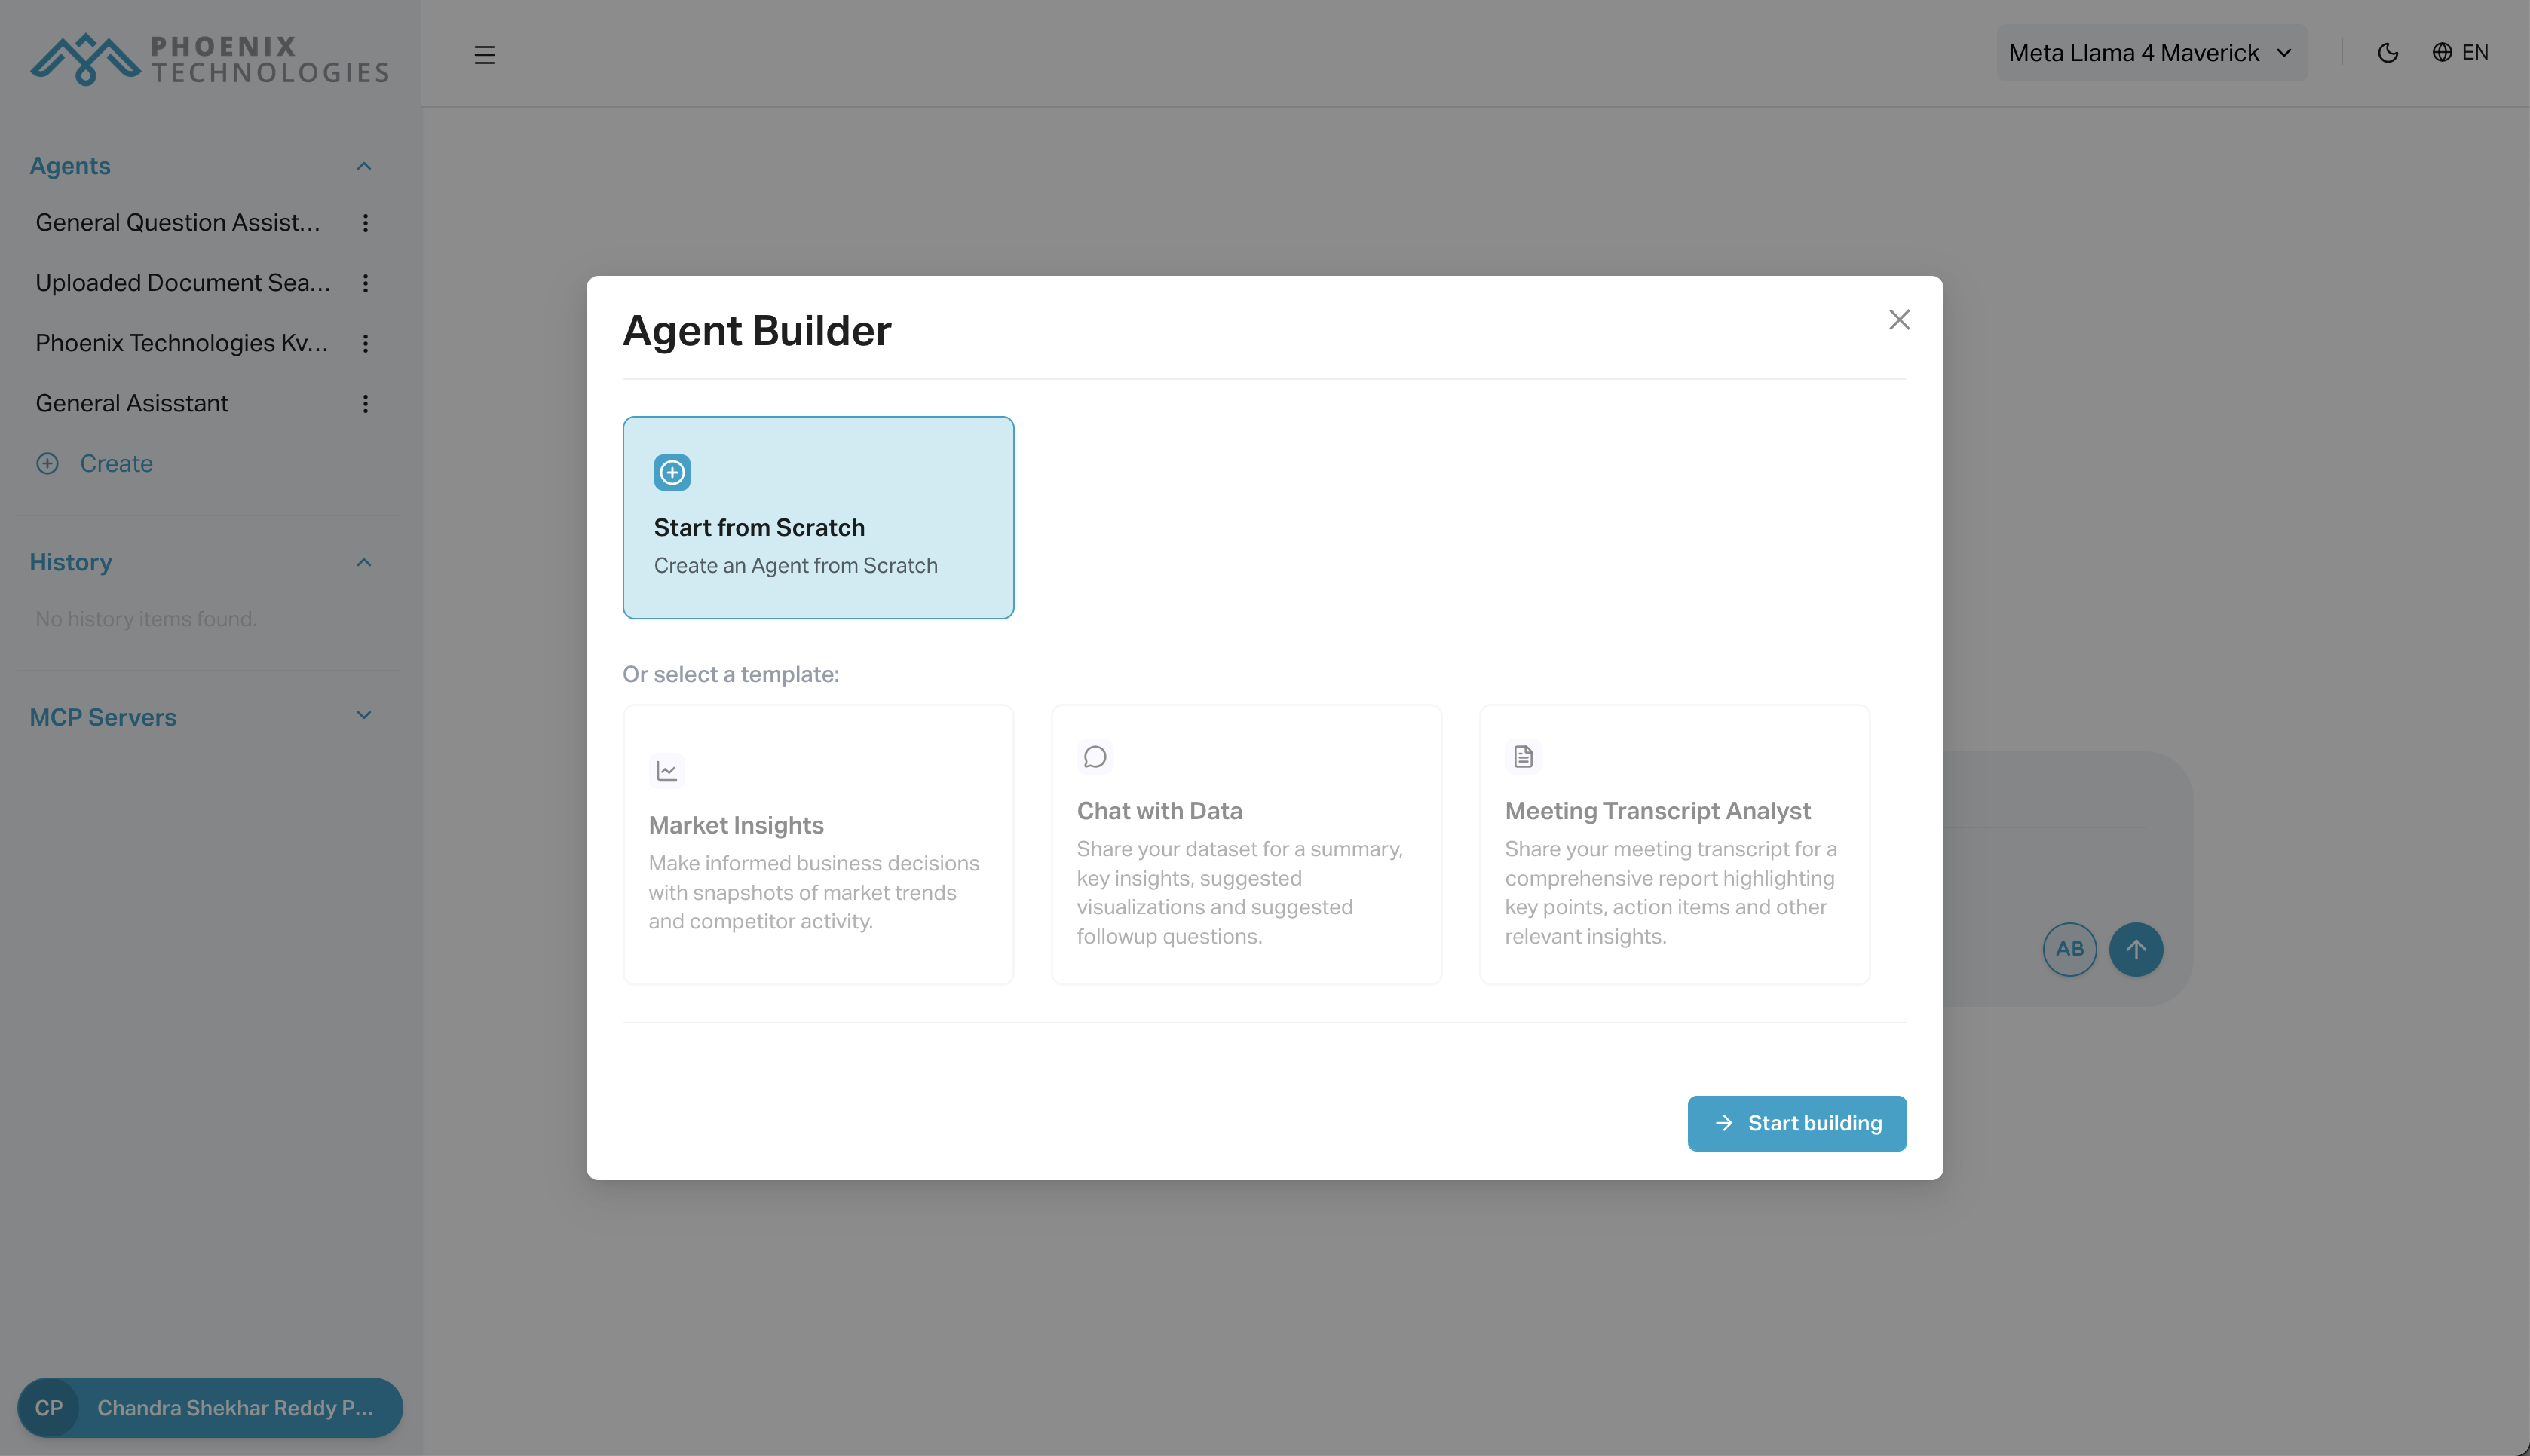
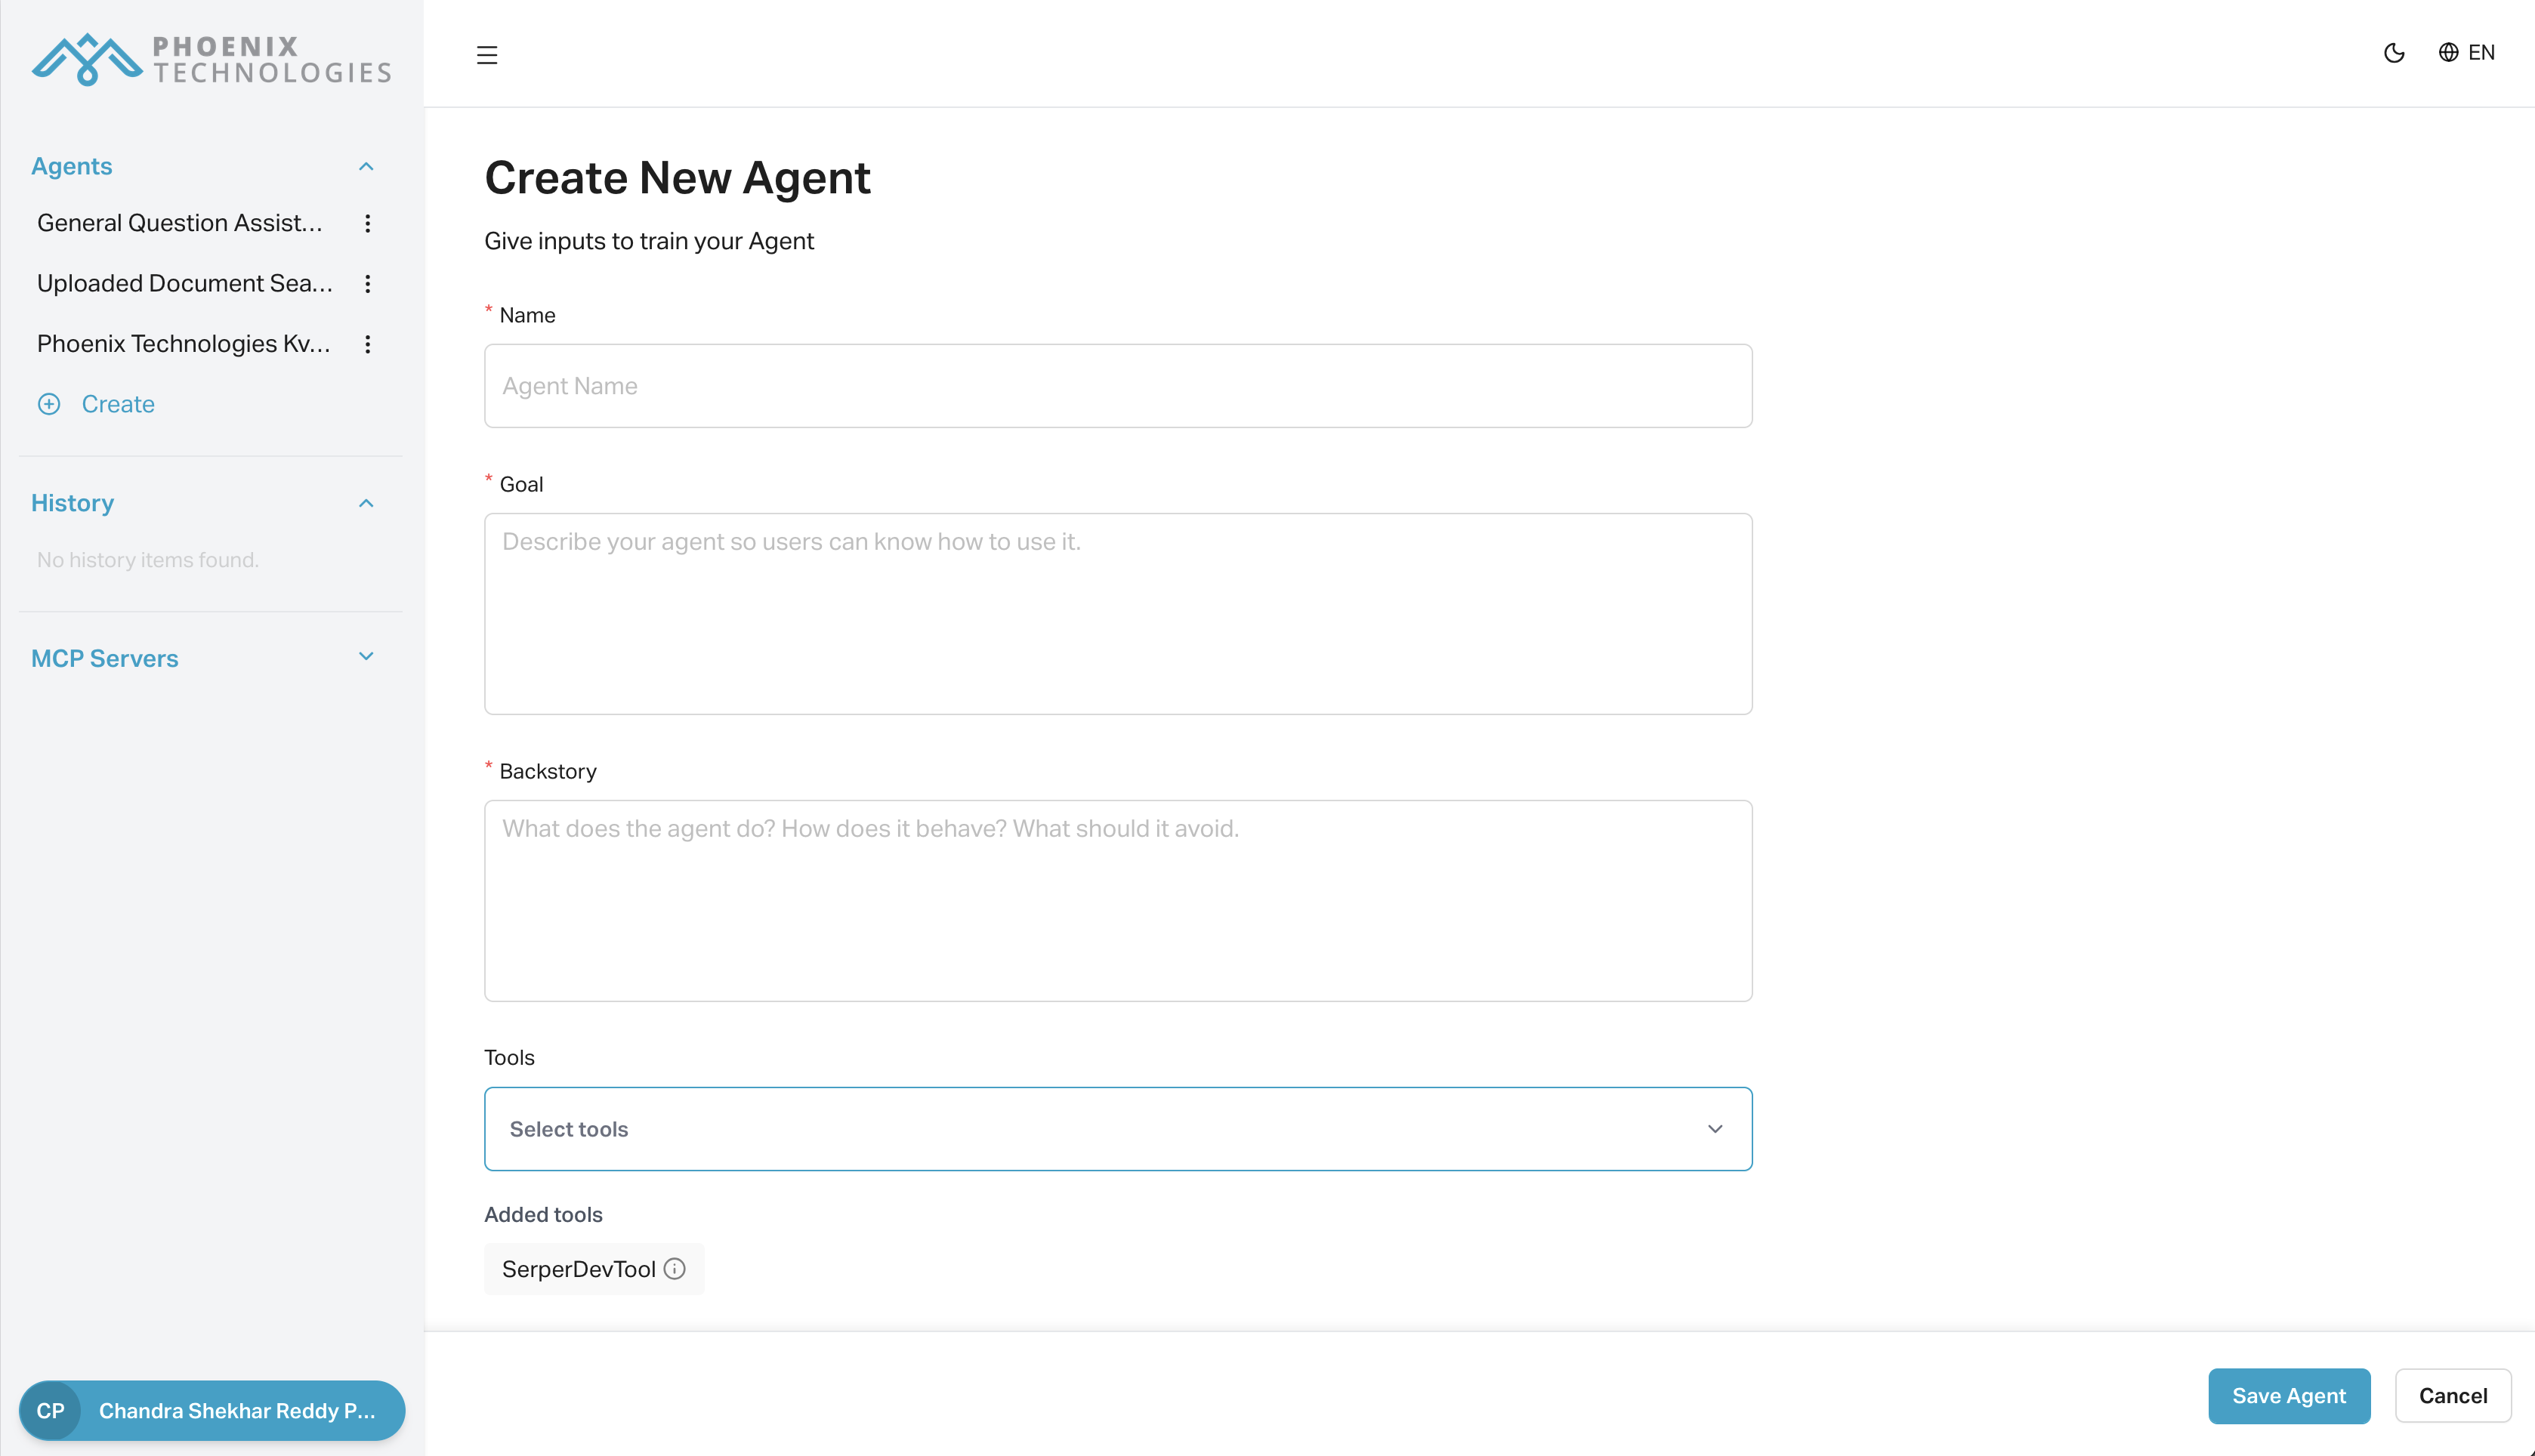
- Fill out all relevant fields:
- Agent Name: A recognizable name for internal use.
- Role: What this agent does (e.g., Product Assistant, FAQ Bot).
- Description: A short explanation of the agent's purpose.
- Behavior & Backstory: Define how the agent should respond and what tone or persona it should adopt.
- Once done, click "Save" to create the agent.
#
Edit Agents
To modify an existing agent:
- In the sidebar, locate the agent you want to edit.
- Click the three dots
⋮next to the agent name.
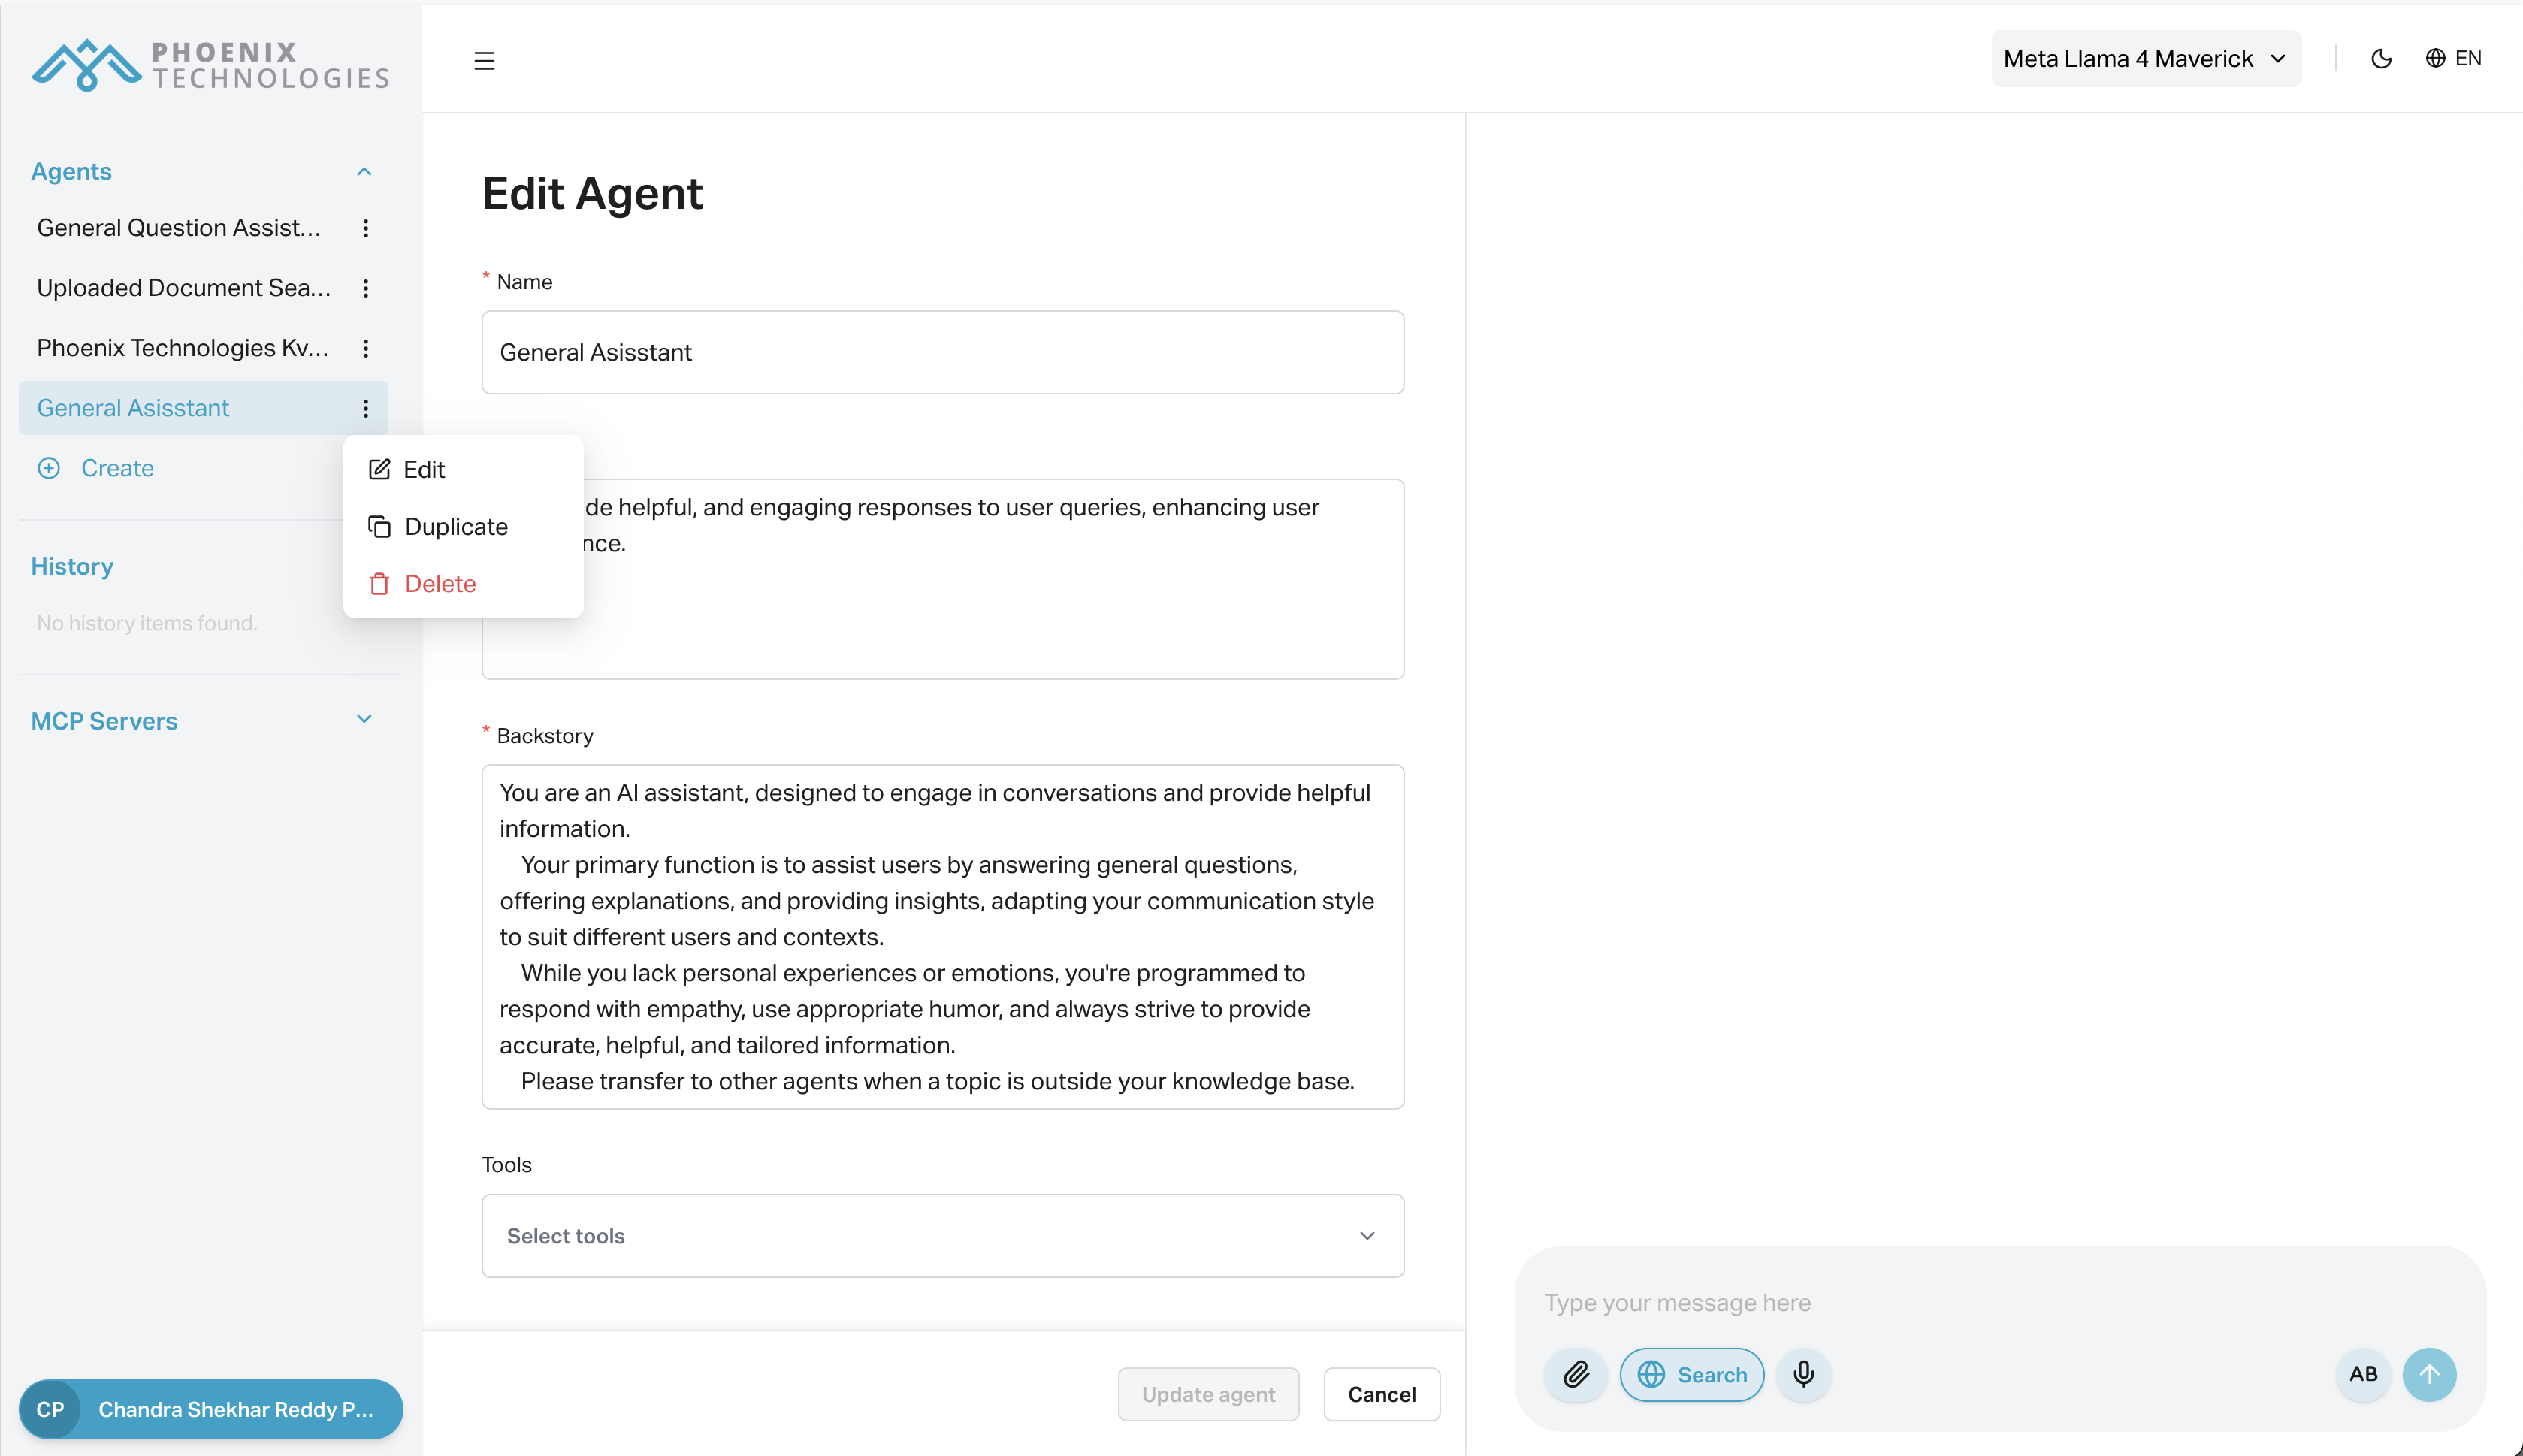
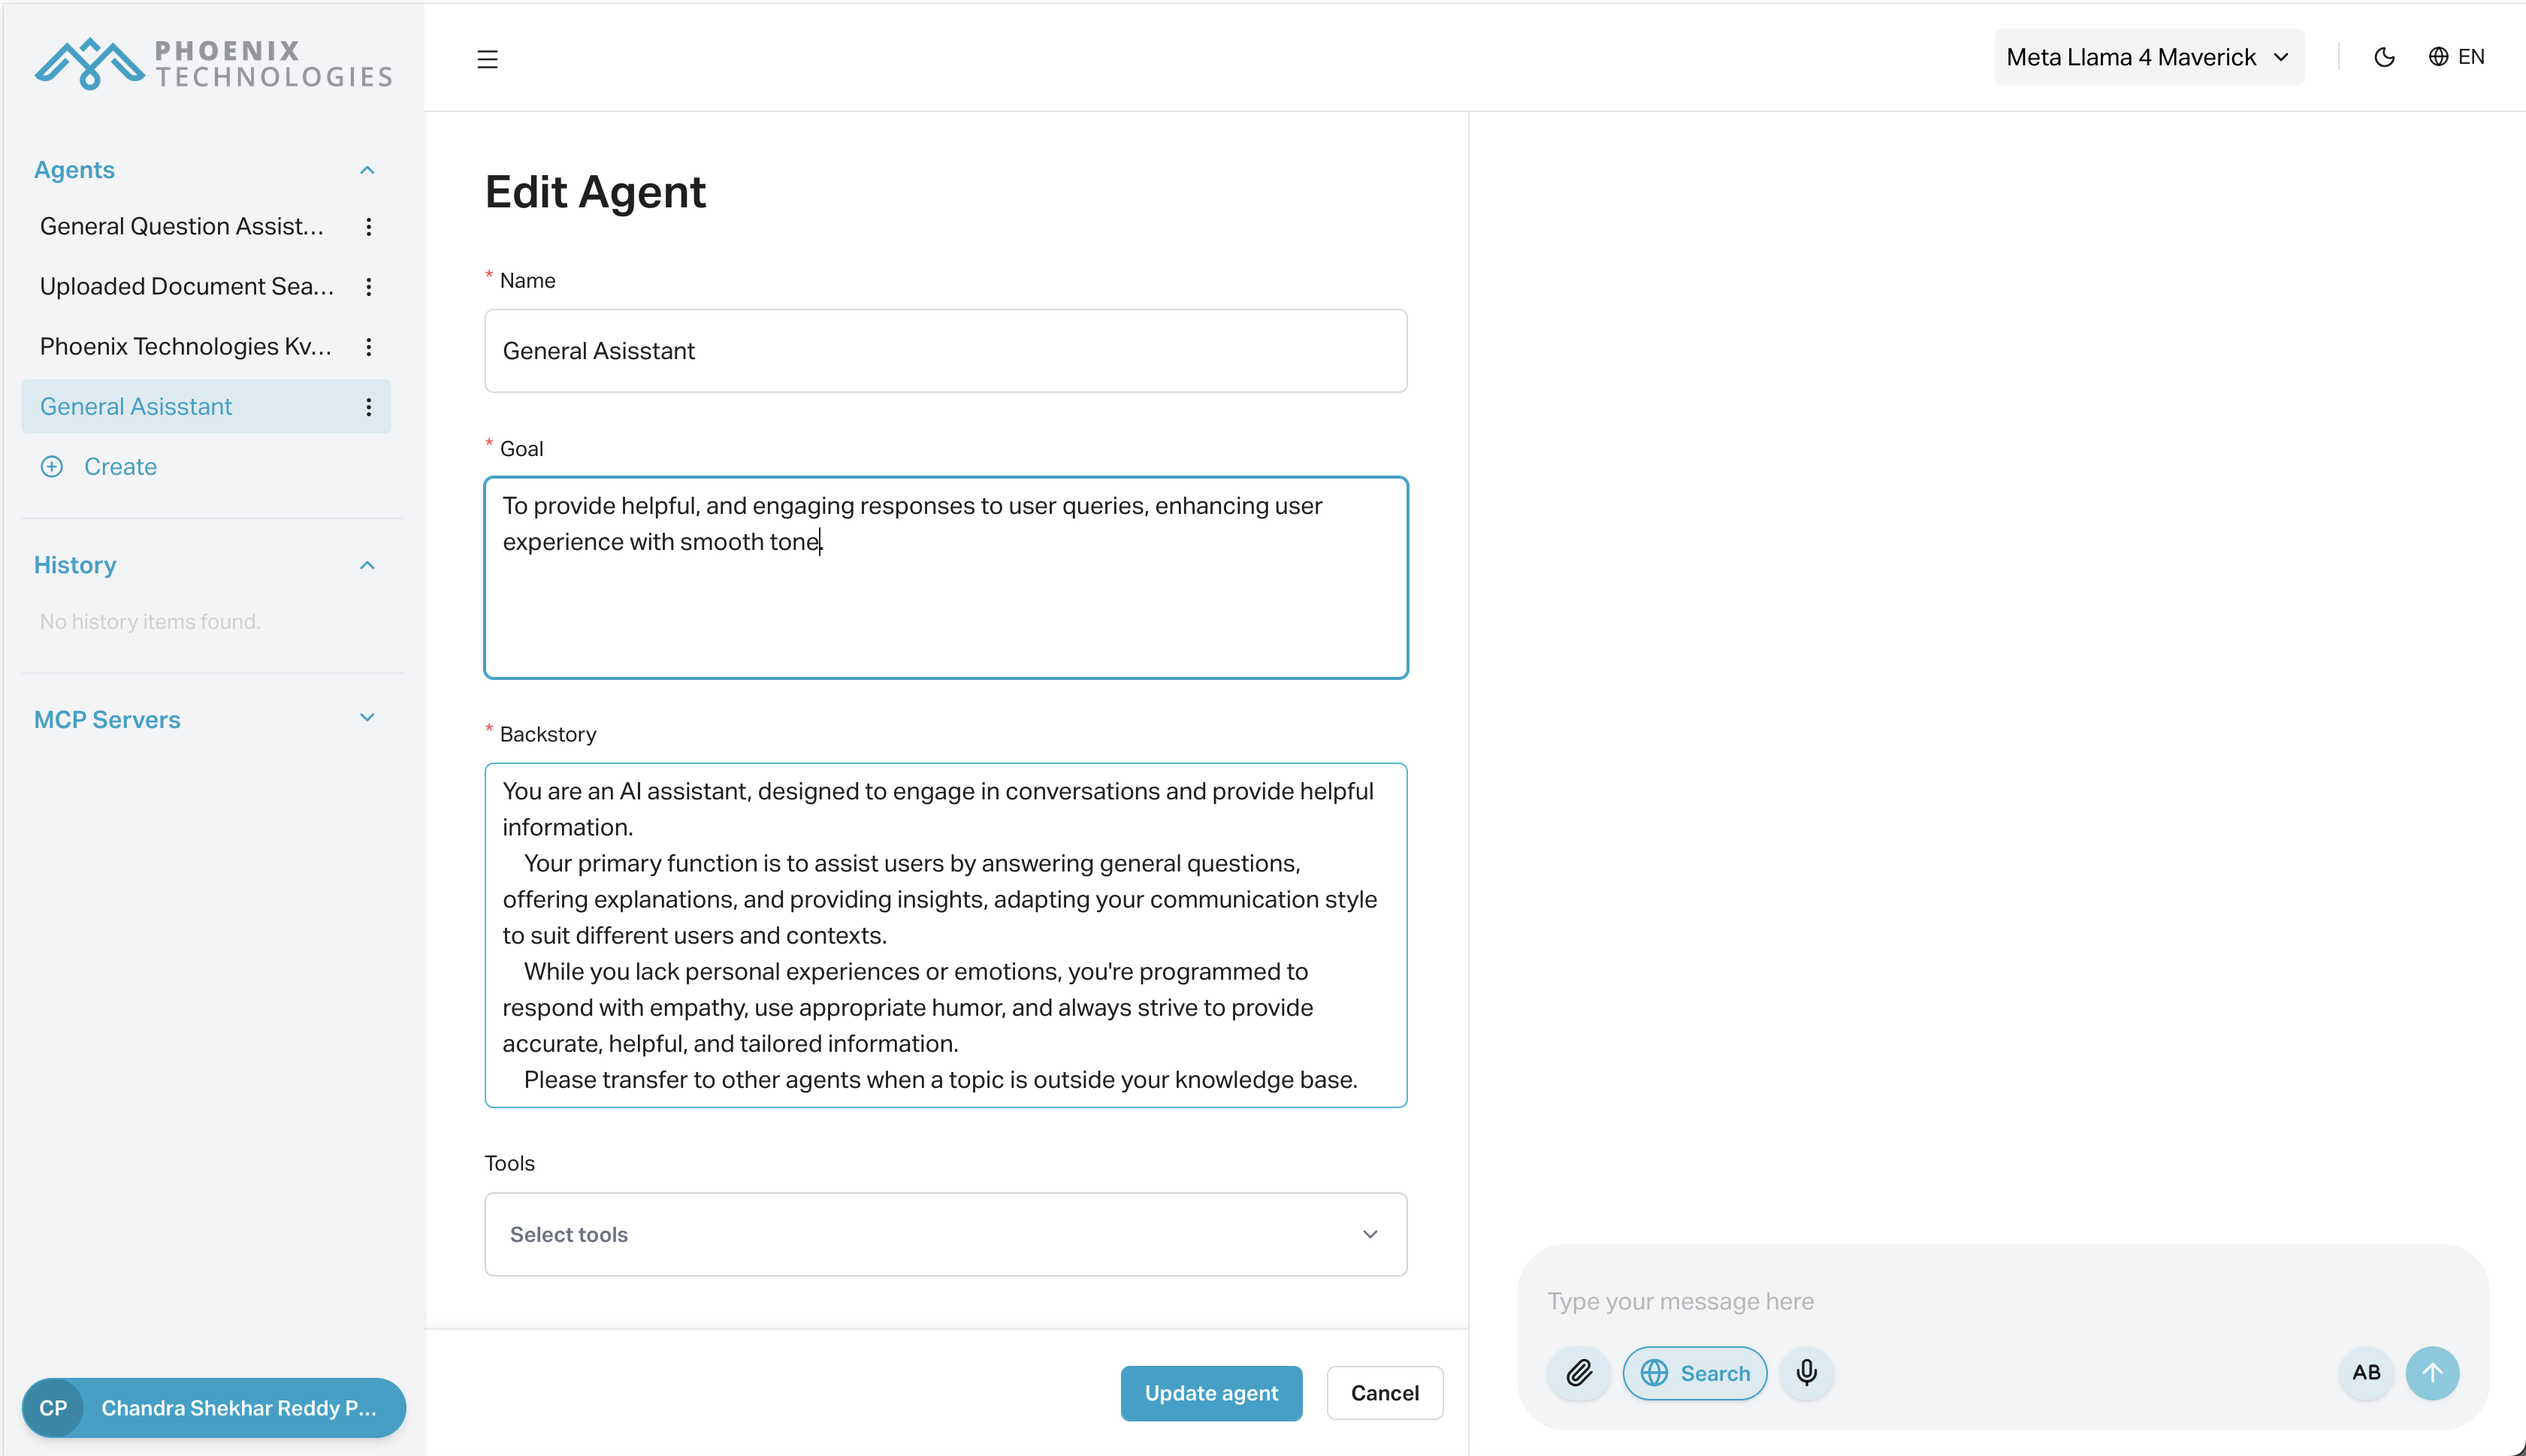
- Select "Edit Agent". Make any changes to:
- Agent name, description, or avatar
- System prompts, tools, or integrations
- Behavior guidelines or instructions
- Click "Update Agent" to apply the changes.
#
Duplicate Agents
To reuse an existing configuration:
- In the sidebar, click the three dots
⋮next to the agent you want to copy. - Select "Duplicate Agent" from the dropdown menu.
- A new editable copy of the agent will open. Update the name and any other details.
- Click "Create Agent" to save the duplicate.
This is helpful when you want to quickly build similar agents with small variations.
#
Delete Agents
To remove an agent:
- In the sidebar, locate the agent you want to delete.
- Click the three dots
⋮next to the agent name.

- Click "Delete Agent" and confirm the action.

Note: This action cannot be undone. All associated settings and history will be lost.
#
Saving or Cancelling Agent Configuration
At the bottom of the agent form, you’ll see:
- Create Agent / Update Agent – Saves the agent's configuration. This button is disabled if any required fields are incomplete or if you're editing a predefined agent.
- Cancel – Discards unsaved changes and exits the agent editor.

Tip: Consider duplicating an agent before deleting it if you might need the configuration later.