
#
Admin Panel
The Admin Panel is where the administrators of a Chat Dedicated instance set it up for their company. They decide what users can do, change instance settings and apply their own branding, without a support ticket.
Your administrators are the users who have the Admin role of your company in the Phoeniqs Console.
#
Open the Admin Panel
Click Admin Panel in the navigation bar on the left. The Admin Panel opens in a new tab. Only administrators see this entry.
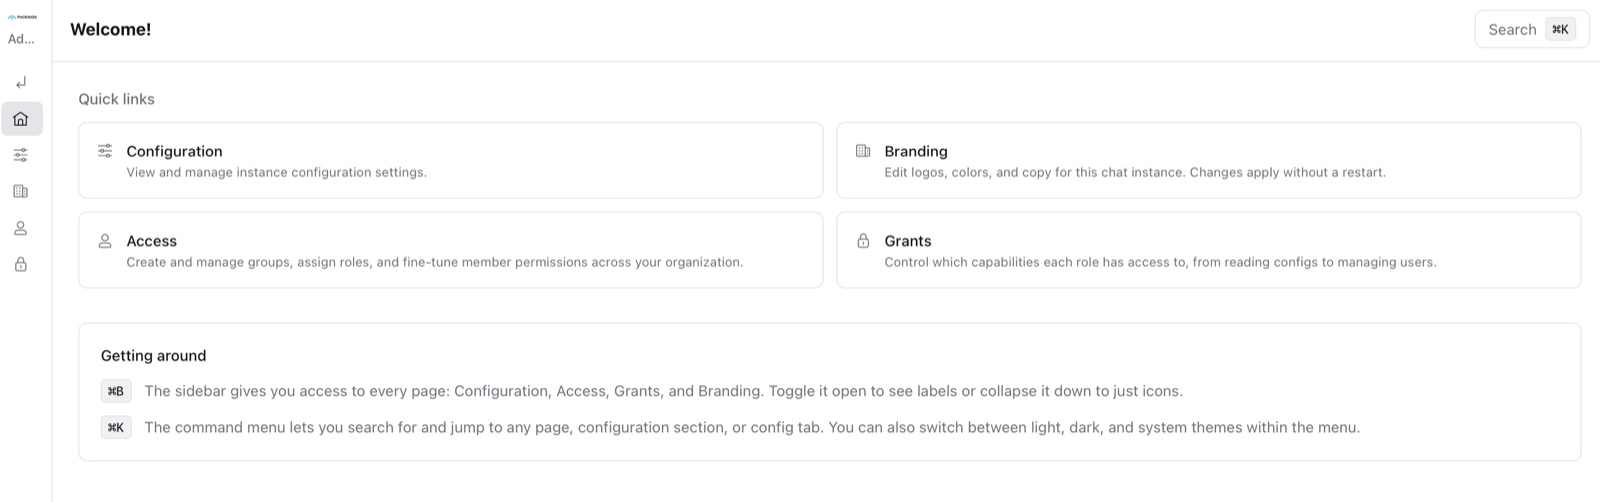
The sidebar on the left leads to every section. Press ⌘K (Ctrl+K on Windows) to search for a page or setting, or to switch between light and dark mode.
Settings live in your instance
Everything you change in the Admin Panel is stored in your Chat instance. If you remove the instance, these settings are deleted with it. Write down important settings before you remove an instance.
#
Configuration
Configuration groups the instance settings into tabs: MCP, Features, Files & storage and System. A setting can apply to everyone, or only to a role, a group or a single user.
The models, model providers and billing are managed by PHOENIQS and do not appear here.
#
Greyed-out settings
Some settings are greyed out. PHOENIQS manages them for every instance, so you can see their current values but not change them. A greyed-out field marked Configured by Phoeniqs has a value set by PHOENIQS. One marked Not configured is not set up for your instance. To have one of these settings changed, contact support.
#
Access
Under Access you manage roles and groups. Open a role to edit it:
- Details: the name and description of the role.
- Permissions: what members of the role may do.
- Members: who has the role.
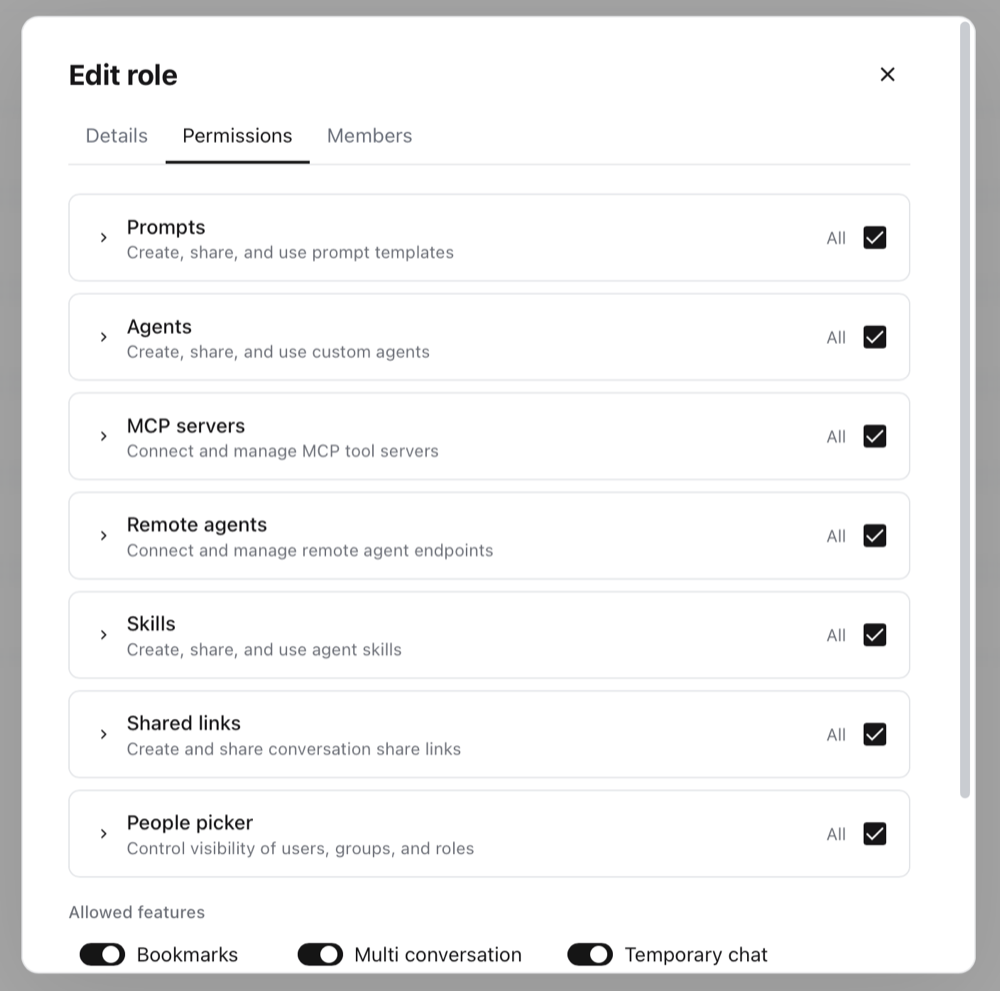
Expand a permission to set its parts separately, for example to let a role use agents without creating them. Under Allowed features you switch individual features on or off for the role, such as Bookmarks, Multi conversation and Temporary chat.
Memory permissions are set in Chat itself. See Memory.
#
Grants
Grants decides which administration tasks each role may perform in the Admin Panel, for example reading the configuration or managing users. Use it to share the administration work, for example by letting a team lead manage groups without changing instance settings.
#
Branding
Branding sets the look of your instance. Changes apply without a restart.
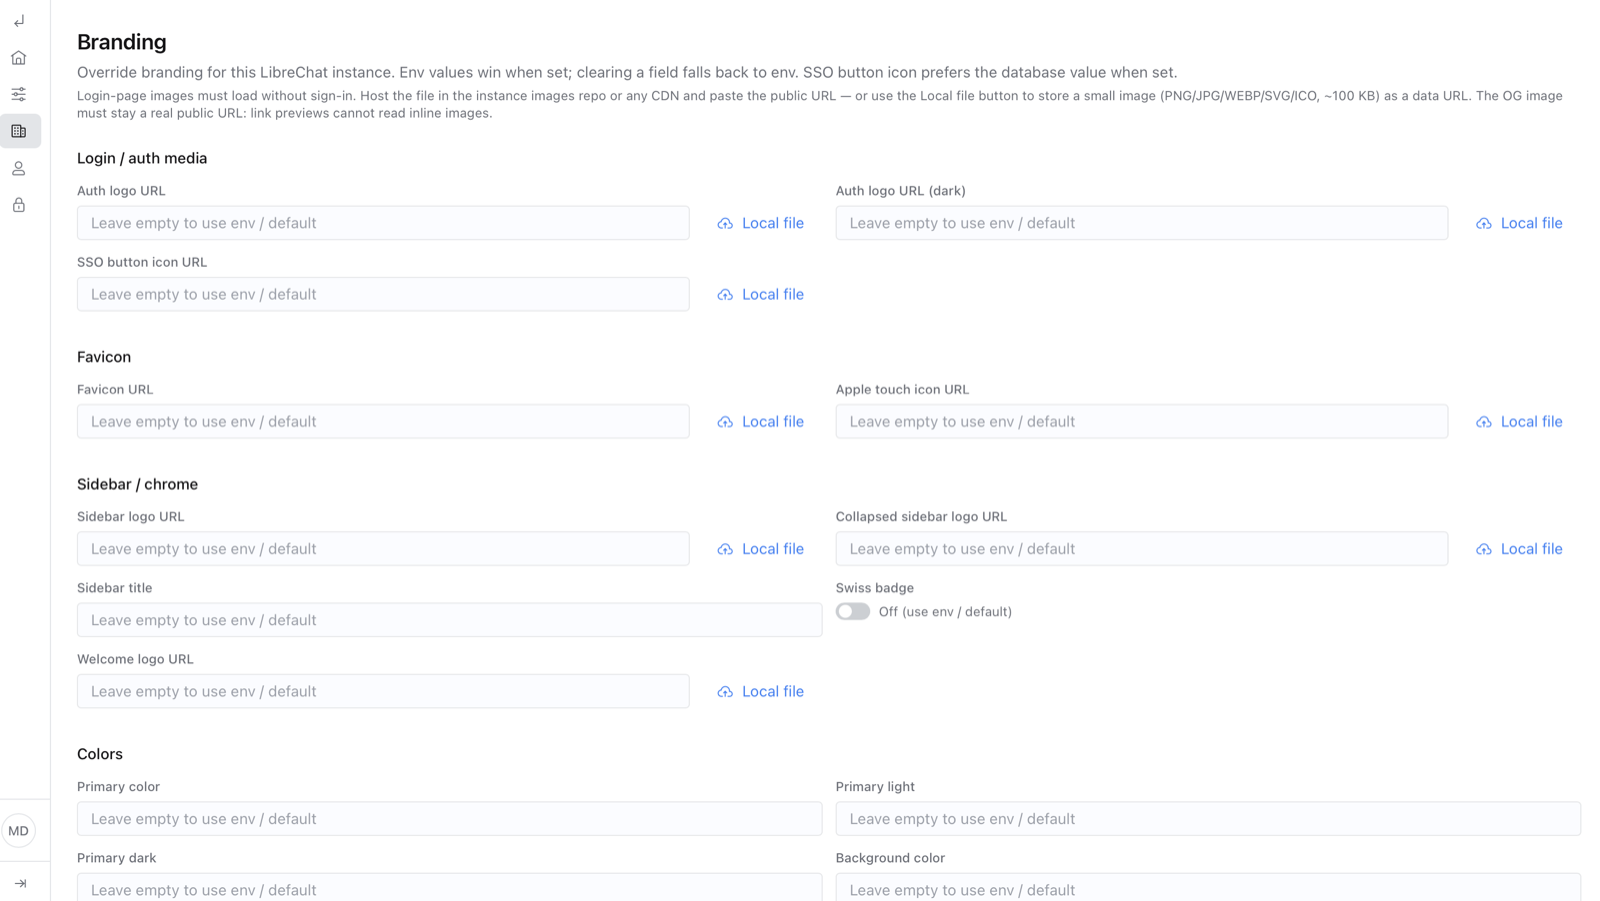
For an image, paste a public URL, or click Local file to store a small image (PNG, JPG, WEBP, SVG or ICO, about 100 KB) in the instance. Login page images must load without signing in, so they need a public URL or a local file. The link preview image must be a public URL.
An empty field keeps the PHOENIQS default.
Set by PHOENIQS
The login page logo, the browser tab icon, the app title and the Swiss badge are set by PHOENIQS for every instance, so changes to them here have no effect. To change them, contact support.
#
Usage Dashboard
The Usage Dashboard is not part of the Admin Panel. It has its own entry in the navigation bar of Chat. See Usage Dashboard.