
#
Hosted Cluster
A Hosted Cluster gives you a dedicated OpenShift Kubernetes cluster with its own control plane, running on Phoeniqs' Swiss sovereign infrastructure. You get full administrative access to your cluster while we manage the underlying control plane infrastructure.
#
What's included
- Dedicated OpenShift control plane — etcd, API server, and scheduler, isolated in its own namespace on the management cluster
- Worker nodes — sized to your requirements
- Cluster API — accessible via a stable hostname, with wildcard SSL/TLS certificates injected automatically during provisioning
- Storage — Ceph-backed storage classes (
ceph-rbdandcephfs), withceph-rbdset as the default storage class
#
Sizing and configuration
When ordering, you'll need to specify and provision the following as separate IaaS resources:
Number and size of worker nodes. Each worker requires 1 GB of memory overhead on top of your workload needs due to virtualization. Example: three 16 GB workers means 51 GB of total RAM provisioned.
Worker root volume: minimum 50 GB per worker
etcd storage: the control plane runs a highly available etcd with 3 members. The etcdSize value you configure applies per member, with a minimum of 10 GB each (30 GB total across all members)
Total minimum capacity pool storage = (3 × etcd size per member) + (number of workers × worker root volume size). Example: 3 workers at 50 GB + etcd at 10 GB per member = 150 GB (workers) + 30 GB (etcd) = 180 GB total
#
Pricing
See Resource Pricing for standard IaaS resource rates.
#
Licensing and lifecycle
New clusters deploy in approximately 10 minutes and start on a 60-day self-support trial license.
During the trial period, you can use the cluster fully, including for testing and evaluation.
To continue receiving support beyond 60 days, request activation before the trial expires by contacting support or opening a service ticket. Once activated, we deploy the cluster to production and it remains available indefinitely.
If activation is not requested before the trial ends, the cluster keeps running and you retain full access, but it falls outside the support agreement until activation is completed.
#
Getting started
#
Prerequisites
A Hosted Cluster can only be provisioned after its Capacity Pool and all required resources (compute, memory, and storage) are already purchased and provisioned in the portal. Only provisioned Capacity Pools appear in the Hosted Cluster form.
See
#
Provision the cluster
In the Phoeniqs portal, open your Resource Group and start a Hosted Cluster subscription. Complete the form with your cluster settings and assign users, admins, and groups as needed:

Click Provision to start deployment.
#
After provisioning
Hosted clusters take approximately 10 minutes to provision. When the cluster is ready, the Configuration tab in the portal shows your credentials and the Launch OpenShift Console link (see below).
Provisioning time
Even after these appear, the console and API may need a short additional time to become fully available — wait a minute or two before logging in if the link does not respond immediately.
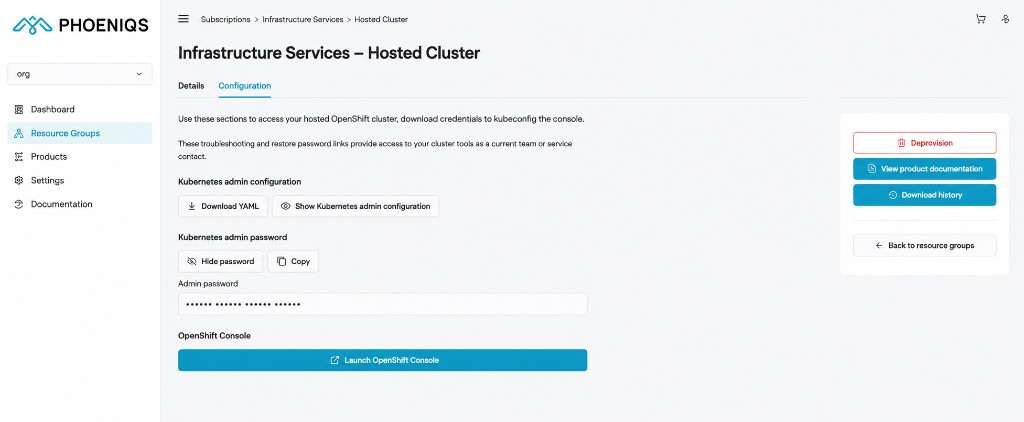
Once provisioning completes, download or view your Kubernetes admin configuration, copy the admin password, and use Launch OpenShift Console to open the cluster. Wildcard certificates are injected automatically — no manual TLS configuration is required.
Wildcard DNS is not yet automated. Request it by opening a service ticket. DNS automation is in progress and will follow an internal migration to PowerDNS.
Log in via the OpenShift console or CLI (oc/kubectl) to begin deploying workloads.
For login and first steps, see Access Your OpenShift.